ABSTRACT
It is explained that, of the many diagnostic tools – some qualitative, others quantitative – available for analysing the condition of oils used in machinery, one of the most powerful, but often excluded on grounds of cost (and also due to a general misunderstanding of its value), is Analytical Ferrography. It is emphasised that because it is qualitative, and its interpretation somewhat subjective, it requires the skill and knowledge of a trained ferrographic analyst. Nevertheless, its benefits significantly outweigh its costs when abnormal wear is encountered.
The basic procedure is explained, i.e. the magnetic separation of wear debris from lubricating oil to prepare the glass slide ferrogram, which is optically examined using a polarized bichromatic microscope and a digital camera. Examples of the resulting images show how they are interpreted to determine the various severities and types of wear that may be present. There are also two short illustrative case studies.
INTRODUCTION
There are many tests available for used fluids analysis. Some are qualitative while others are quantitative in scope. One test often overlooked is Analytical Ferrography, one of the most powerful of today’s diagnostic tools for oil analysis. When implemented correctly it is an excellent tool when attempting to diagnose an active wear problem, yet it too has its limitations. It is frequently excluded from oil analysis programmes because of its comparatively high price and a general misunderstanding of its value.
The test is qualitative, which means it relies on the skill and knowledge of the ferrographic analyst. While this can have definite advantages, the interpretation is somewhat subjective and requires detailed knowledge of wear debris failure modes. The test procedure is also lengthy and requires the skill of a trained ferrographic analyst. As such, there are significant costs in performing analytical ferrography which are not present in other oil analysis tests. Nevertheless, if time is taken to fully understand what it uncovers, most agree that the benefits significantly outweigh the costs and elect to automatically incorporate it when abnormal wear is encountered.
THE FACTS ABOUT ANALYTICAL FERROGRAPHY
- It is the best method for determining the severity and the type of wear present.
- There are no particle size or metallurgy limitations.
- Wear can be documented by digital photography.
- The test procedure is lengthy and requires the skill of a trained analyst.
- The test is qualitative, which means the interpretation is somewhat subjective and relies on the skill and knowledge of the ferrographic analyst.
INSIDE THE LAB
To carry out analytical ferrography the solid debris suspended in a lubricant is separated and systematically deposited onto a glass slide which is then examined under a microscope to distinguish the size, concentration, composition, morphology and surface condition of the ferrous and non-ferrous wear particles – a detailed examination which, in effect, uncovers the mystery behind an abnormal wear condition by pinpointing component wear, how it was generated and, often, the root cause.
THE FERROGRAM
Analytical ferrography begins with the magnetic separation, using a ferrogram slide maker, of machine wear debris from the lubricating oil in which it is suspended. The lubricating oil sample is diluted for improved particle precipitation and adhesion. The diluted sample then flows down a specially designed glass slide called a ferrogram. The ferrogram rests on a magnetic cylinder, which attracts ferrous particles out of the oil (see Figure 1).
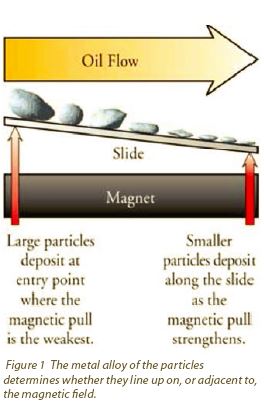
Due to the magnetic fluid, the ferrous particles align themselves in chains along the width of the slide with the largest particles being deposited at the entry point. Non-ferrous particles and contaminants, unaffected by the magnetic field, travel downstream and are randomly deposited across the length of the slide. The deposited ferrous particles serve as a dyke in the removal of non-ferrous particles. The absence of ferrous particles substantially reduces the effectiveness with which non-ferrous particles are removed.
After the particles are deposited on the ferrogram a wash is used to remove any remaining lubricant. The wash quickly evaporates and the particles are permanently attached to the slide. The ferrogram is now ready for optical examination using a bichromatic microscope.
 PARTICLE IDENTIFICATION
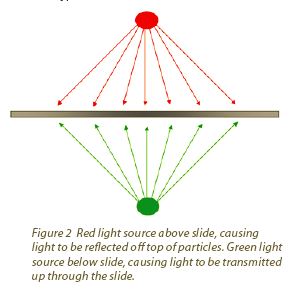
The ferrogram is examined under a polarized bichromatic microscope equipped with a digital camera. The microscope uses both reflected (top) and transmitted (bottom) light to distinguish the size, shape, composition and surface condition of ferrous and nonferrous particles (see Figure 2). The particles are classified to determine the type of wear and its source.
EXAMINING THE EVIDENCE – WEAR PARTICLES
The particles contained in a lubricating fluid carry detailed and important information about the condition of the machine components.
SIZE DOES MATTER…SO DOES SHAPE AND METALLURGY!
Particles are categorized based on size, shape, and metallurgy. Conclusions can be drawn regarding the wear rate and health of the component that the sample was drawn from. The analyst relies on the following to determine the following characteristics of the particles:
✓ Composition: Colour can identify the composition of the particles. Heat treating the slide causes specific colour changes to occur in various types of metals and alloys. The particle’s composition indicates its source.
✓ Shape: The particle’s shape reveals how it was generated. Abrasion, adhesion, fatigue, sliding, and rolling contact wear modes each generate a characteristic particle type in terms of its shape and surface condition.
Analytical ferrography requires extensive analyst training in properly interpreting the results. Evaluation of a ferrogram can differ between analysts due to the subjectivity of the analysis. The level of training and experience will also have an impact on the accuracy of the ferrographic evaluation. A trained oil analyst can visually determine the severity of wear on the unit (using a microscope to classify the particles according to size, shape, and metallurgy) and can evaluate the concentration, size, shape, composition, and condition of the particles, which indicates where and how they were generated. Solid contaminants can also be visually identified provided they are commonly found. Sand and dirt, fibres, oxidation products, rust, and metal oxides are examples of contamination debris that can be identified.
Analytical ferrography is the best method for determining severity and type of wear present, with no particle size or metallurgy limitations. Its reports typically include a photo-micrograph of the debris found, along with specific descriptions of the particles in their suspected cause. The following are the photomicrographs and classifications of wear that may be detected.
CASE CLOSED: PHOTOMICROGRAPHS AND WEAR CLASSIFICATIONS
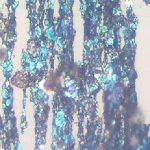 Rubbing wear
Description. Ferrous particles, less than 30 microns in size.
Sources: Rubbing wear is typically found in both reciprocating and non-reciprocating units.
Comments. On a ferrogram the particles tend to align in chains. Normal ferrous wear can be categorized as low alloy, cast iron and high alloy steel.
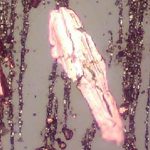 Severe wear
Description. Metallic particles greater than 30 microns.
Sources: Fatigue or component overload, that causes larger pieces of wear to detach, creates severe wear.
Comments. Severe wear is a definite sign of abnormal running conditions.
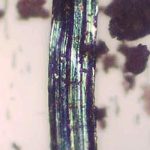 Sliding wear
Description. Metallic particles, both normal and severe, with sliding striations along one or more surfaces.
Sources: Sliding wear can be created when two parts of a machine scrape together.
Comments. Sliding striations are often a good clue as to what part of a machine is causing wear.
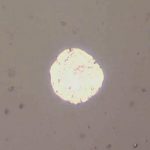 Laminar
Description. Thin, smooth, particles which appear to have been rolled flat.
Sources: Roller bearings, areas where high-pressure angled or lateral contact occurs.
Comments. Wear created by extraneous particle if the laminar has small holes or indents.
 Cutting wear
Description. Shaved metal particles that look like wood shavings from a lathe. Seen in sleeve bearings and shaft couples.
Sources: Abrasives embedded in soft bearing or burrs on hardened metals create these wear particles.
Comments. Worm drives have a tendency to create this type of particle. When seen it indicates abnormal wear.
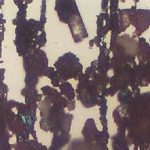 Dark metal oxide wear
Description. Grey to black chunks with a semi-metallic appearance and mottled edges.
Sources: breakdown of boundary film, excessive operating temperatures, lubricant oxidation.
Comments. The darker the colour, the more severe the oxidation of the particle.
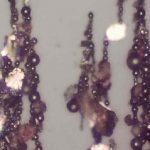 Sphere
Description. A relatively smooth spherical particle.
Sources: Spheres are created in bearing fatigue cracks, typically roller bearings.
Comments. Spheres are often precursors of bearing spalls. A large increase in quantity is indicative of imminent spalling.
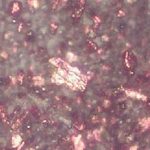 Non-ferrous metal wear
Description. Any metallic particle that is not ferrous. Most common include aluminum, copper alloy, chrome, and Babbitt metal.
Sources: Non-ferrous wear can be created by the machines or as additive packages in the lubricant.
Comments. Non-ferrous metallic wear can be across the entire length of a ferrogram. These particles will not be aligned with the ferrous wear chains.
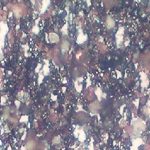 Contaminants
Description. Dirt, sand and other silica particulate.
Sources: Contaminants can enter into a system by a variety of ways: poor seals, incorrectly installed breather, during oil change, etc.
Comments. Some can appear like crystals. Contaminants are easily identified by using only the transmitted light source on the microscope.
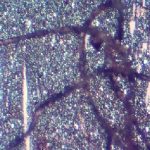 Fibre
Fibre
Description. Fibres are thread-like material made of asbestos, paper, glass or a synthetic material.
Sources: Most common source is filter material. Could be from machine housing, cleaning rags, or air contaminants.
Comments. A small amount of fibrous material in oil is common.
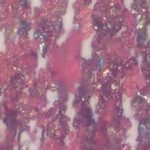 Red oxide
Description. Iron oxides or rust. It appears as orange/red in colour.
Sources: Produced when moisture enters into a system. Water does not have to be present when red oxides are seen, as they are often difficult to filter out of oil.
Comments. Red oxides are not necessarily magnetic like ferrous wear. Alpha haematite is paramagnetic and will be found on all regions of a ferrogram.
POINTS TO REMEMBER
Only a skilled ferrographic analyst can determine the nature, severity and root cause of abnormal wear by analyzing the size, shape, colour, magnetism, light effects and surface detail of wear particles. This information enables maintenance to implement effective corrective action, but don’t forget the following four important points –
(i) It is proven that analytical ferrography is an excellent tool when attempting to diagnose an active wear problem. However, remember that the test is qualitative, which relies on the skill and knowledge of the analyst. Be sure you enlist the services of an experienced ferrographic analyst because the interpretation is somewhat subjective and requires detailed knowledge, not just of analytical chemistry, but also machine and tribological failures.
(ii) The test procedure is lengthy and requires the skill of a well-trained analyst. As such, there are significant costs not present in other fluids analysis tests. But, if time is taken to fully understand what analytical ferrography can uncover, most agree that the benefits significantly outweigh the costs and elect to automatically incorporate it when an abnormal wear condition is encountered.
(iii) As with all fluids analysis samples, it is especially important to properly take samples of the fluid. They should be representative of the conditions that are going on inside the equipment, and this is dependent on the way the sample is taken and on the location where the sample is taken from.
(iv) Another critical factor in fluids analysis, and in analytical ferrography in particular, is the need of the customer to provide specific information, as detailed as possible, about the machine or component the sample was taken from. This includes information about the lubricant, the component manufacturer, the model and type of component. The more detailed the information, the better the diagnosis of the test results.
CASE STUDY I
Equipment: Ingersoll Rand single-stage centrifugal pump, 12,000 gpm, single inlet, driven by a 2000 hp motor at 1780 rpm.
Application: A steel mill uses this pump to boost the pressure of the water it supplies to the hot mill for de-scaling. Thin scale forms rapidly on the hot slab and must be removed before entering the mill stands. The high pressure water breaks the scale loose from the slab and removes it. The pump has Babbitt sleeve bearings with a Kingsbury thrust bearing on the outboard bearings.
History: Oil samples from this pump are routinely sent for analysis and historically have exhibited normal machine and lubricant conditions. Spectroscopic analysis and direct reading ferrography are routinely performed in order to trend the wear of the lubricated bearings. Analytical ferrography is automatically carried out when there is a machine abnormality.
Problem sample: The sample drawn on 7/3/12 exhibited excess iron wear, abnormal silicon and excessive total ferrous wear. The machine condition was judged to be critica,l and analytical ferrography was automatically initiated to pinpoint the source of the problem. Analytical ferrography:
 100 x
100 x
 500x
500x
Analytical ferrography showed high amounts of dark metallic oxides and low alloy. This correlated with the data from the spectrometer and the direct read ferrography.
Conclusions: The maintenance department issued a work ticket to change the oil and inspect the pump bearings. Upon inspection it was found that the thrust bearing was severely damaged. The thrust shoes were deeply scored and the thrust assembly was badly damaged. The pump was pulled from operation.
The routine oil analysis uncovered a problem that was easy to repair. The inspection occurred on a planned basis, thus preventing possible downtime. If the pump were left in service, it would have catastrophically failed. This pump costs more than $50,000!


CASE STUDY II
Equipment: Westinghouse 5,000 HP motor
Application: A steel mill uses this motor to drive a double reduction gearbox on a roughing mill at an input speed of 450 rpm. The motor has Babbitt sleeve bearings and is coupled to the gearbox with a #11 Kop-Flex gear coupling.
History: Oil samples from this motor are routinely sent for analysis and historically have exhibited normal machine and lubricant conditions. Spectroscopic analysis and direct reading ferrography are routinely performed in order to trend the wear of the lubricated bearings. Analytical ferrography is automatically performed when there is a machine abnormality.
Problem sample: The sample drawn on 5/18/12 exhibited excess lead wear, excess tin wear and a high total ferrous wear count. The customer was called and submitted another sample. The sample drawn on 5/24/12 exhibited the same abnormalities and the machine condition was judged to be marginal. Analytical ferrography was automatically initiated to pinpoint the source of the problem.
Analytical ferrography
 100x
100x
 500 x
500 x
Analytical ferrography showed high amounts of low alloy steel and dark metallic oxides. The coloured particles on the top slide are low alloy steel that changed colour after heat treatment.
Conclusions: The results of the oil analysis initiated a visual inspection, which revealed that the coupling appeared to be locked. The maintenance department issued a work order to inspect the motor bearing and coupling. Upon removal of the bearing cap it was found that the faces of the bearing were wiped. The bearing surface that the shaft rode on was also starting to wipe. The bearing was changed.
Maintenance completed the repairs on a planned basis with no delay to the mill. If left unrepaired, the motor bearing would have failed catastrophically. Such a failure while the mill was running would have caused a four-hour delay to the mill with a cost in excess of $60,000!


The author can be contacted at mcmahon@testoil.com
And for further content on Analytical Ferrography see – http://testoil.com/services/oil-analysis/analyticalferrography/
http://testoil.com/knowledgecenter/video-library/

